Homework 2 process
This page shows the steps and processes I took in developing and creating this assignment.
Planning & Design
At the start of this assignment we each were to think of an idea for a form that would take in user input, do some sort of calculation and then provide an output to the user. This took me a while to think of an idea as I wanted to keep it simple. I thought to myself, what is something that would be useful for me to use right now? Then it clicked! I had decided that I would create a homework tracker. Below is a rough sketch on what I wanted to create.
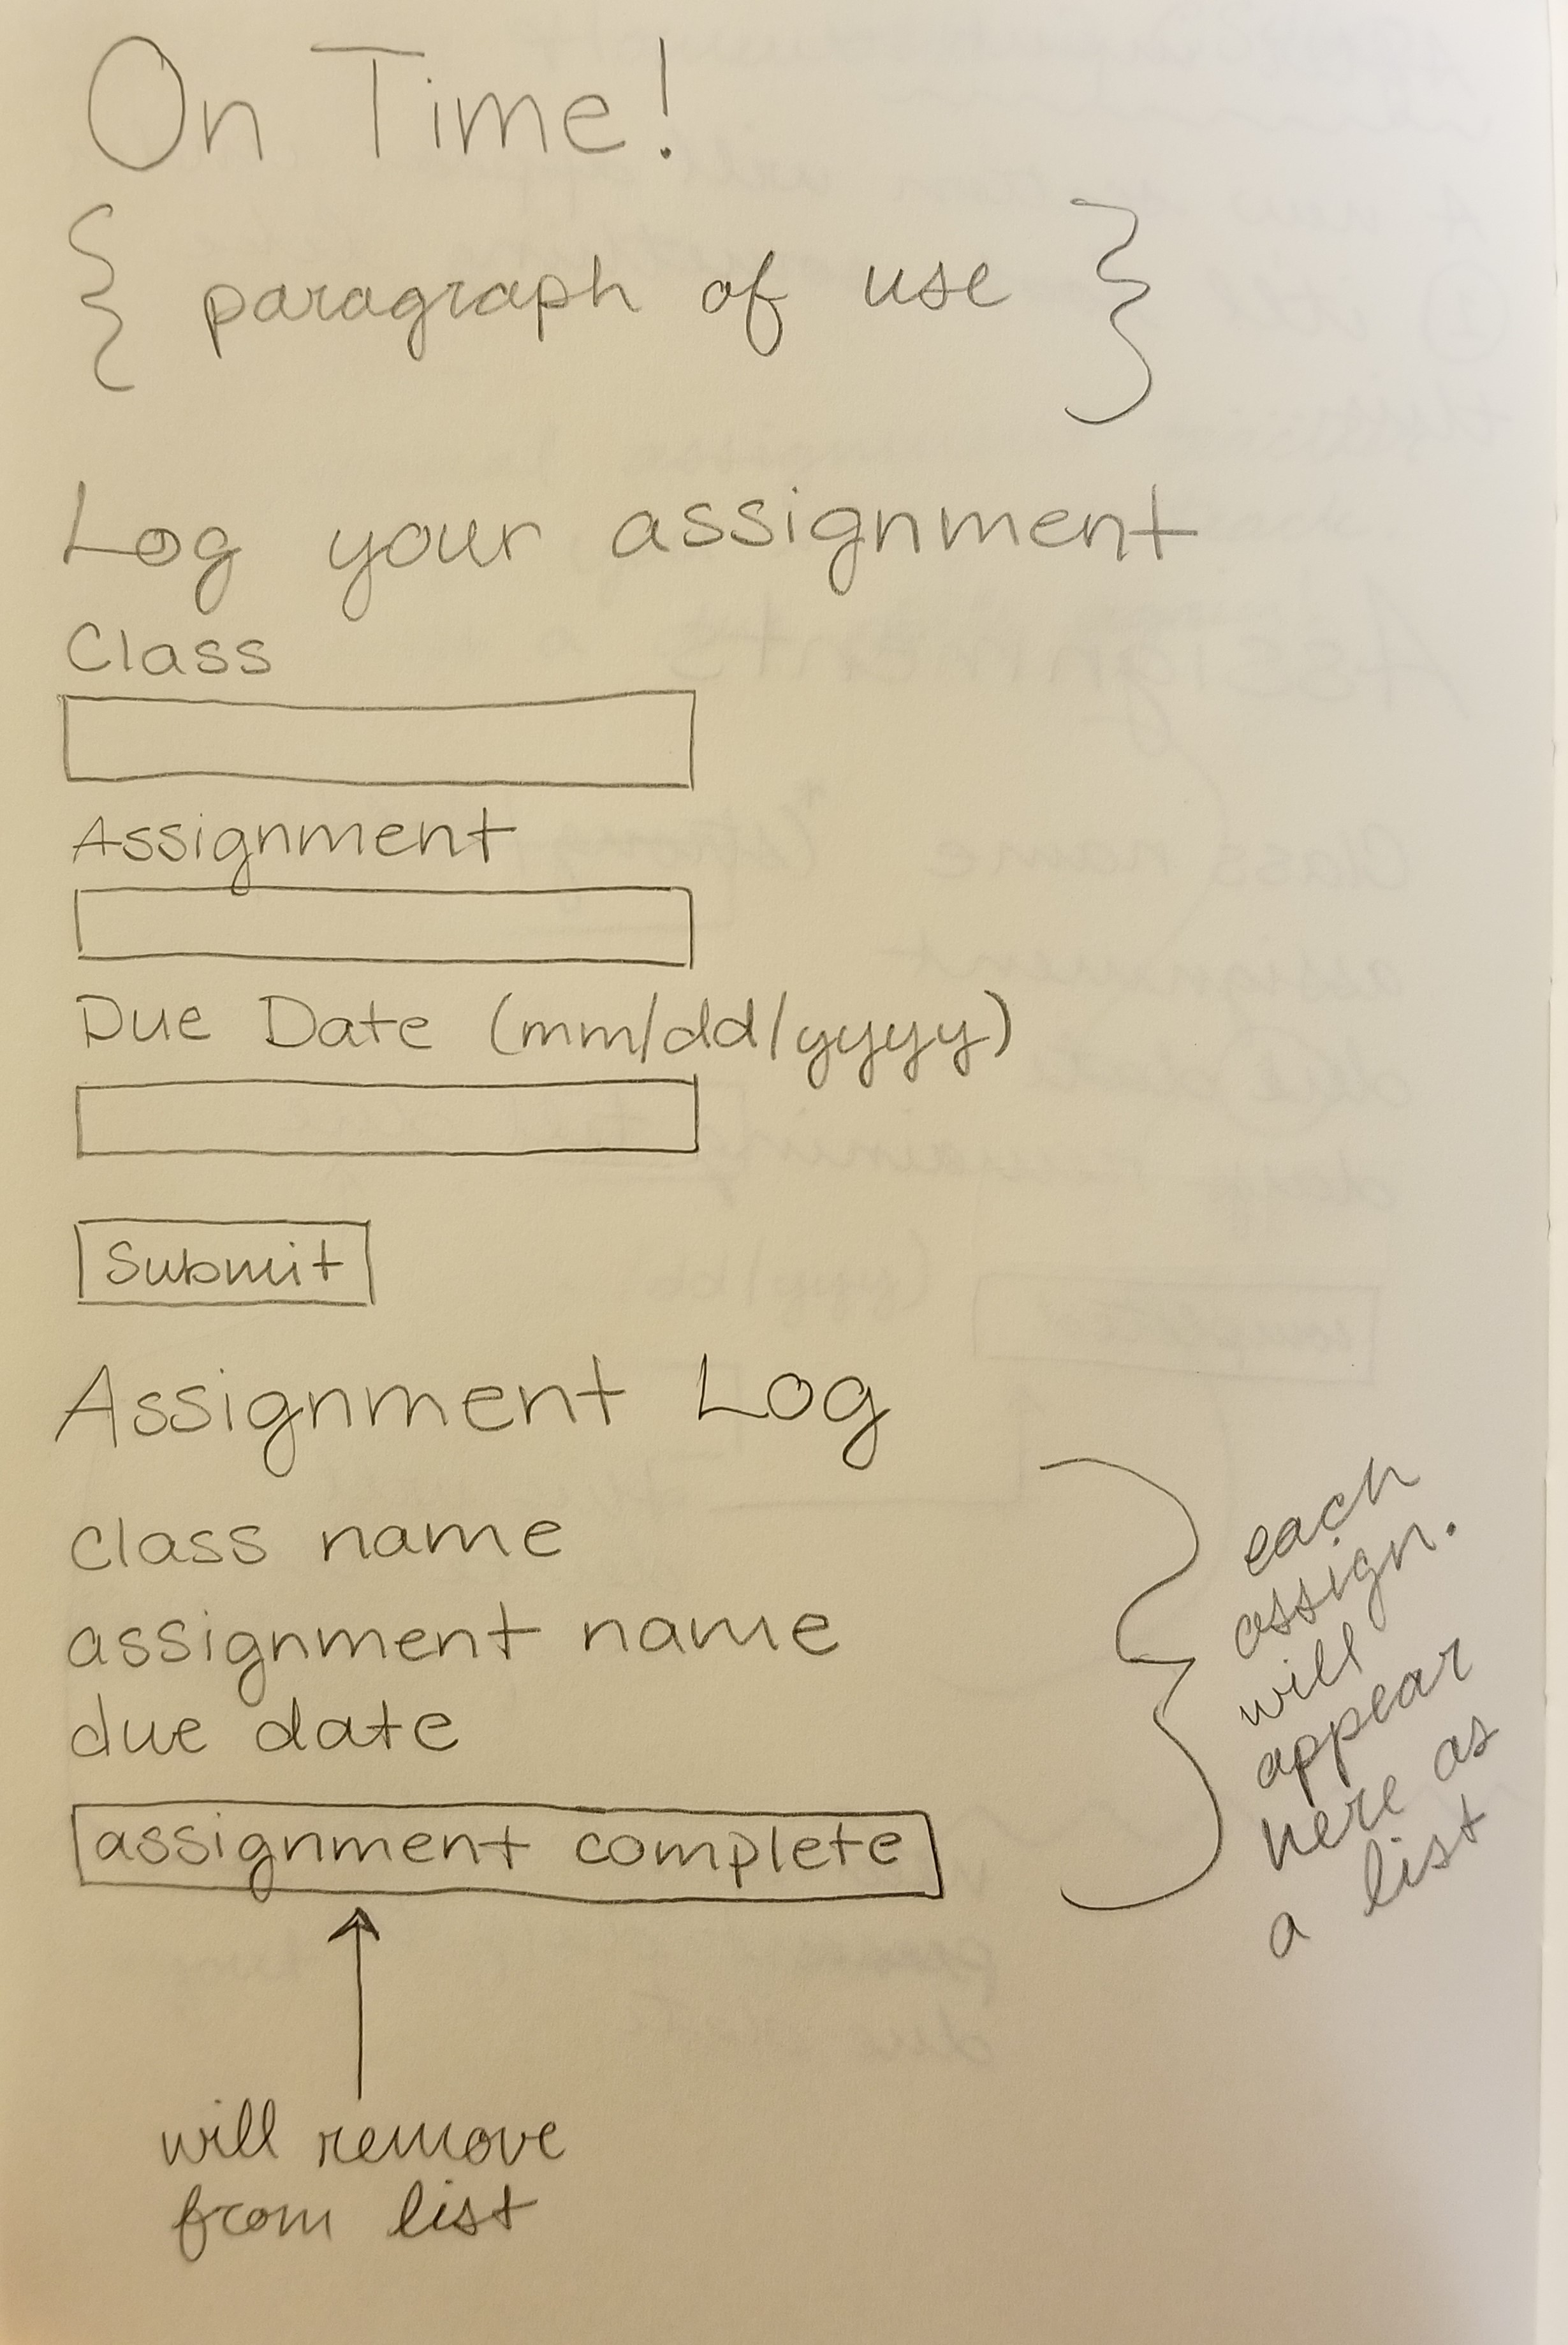
I decided to call this tracker "On Time!" It only made sense because the goal for students is to turn in their assignments on time as often as possible. I decided that I would work with one container/column. I didn't want to go into too much detail with trying to work with two or more columns.
Content & Coding
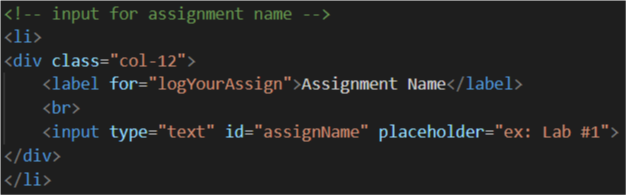
As far as creating forms in Bootstrap I had little to no knowledge on how to create one. I looked into the Bootstrap documentations and was able to find some guideance there. As I was going thorugh the code there were a few details starting to form that I didn't fully consider in my sketch. For example, the "placeholder" that I could add inside of each text box. It was something I had considered when notifying the user about the date input but at the time it didn't occur to me to also give the user an example of what to insert into the class name and assignment name text boxes.
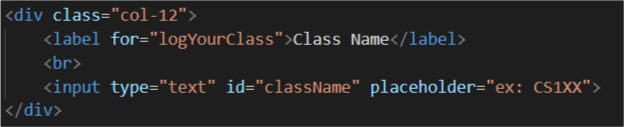
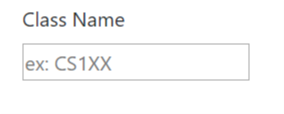
For the text boxes I had decided to display them in a list so that they would be formatted one on top of the other on my site. I used an unordered list. My only issue with this part of the code was that I wish I was able to have the little bullet points removed for visual purposes but that is a problem to solve for another day for me. Looking at the picture below you can see one of my text boxes being defined inside of a list element "li".
My biggest challenge with this assignment was learning how to use Javascript. There was a lot of time spent trying to figure out if my user input was being received. Through much trial and error with different variations of code, it was brought to my attention by one of my classmates to use the "console.log()" function. Boy, how I have learned how helpful that little tool was!
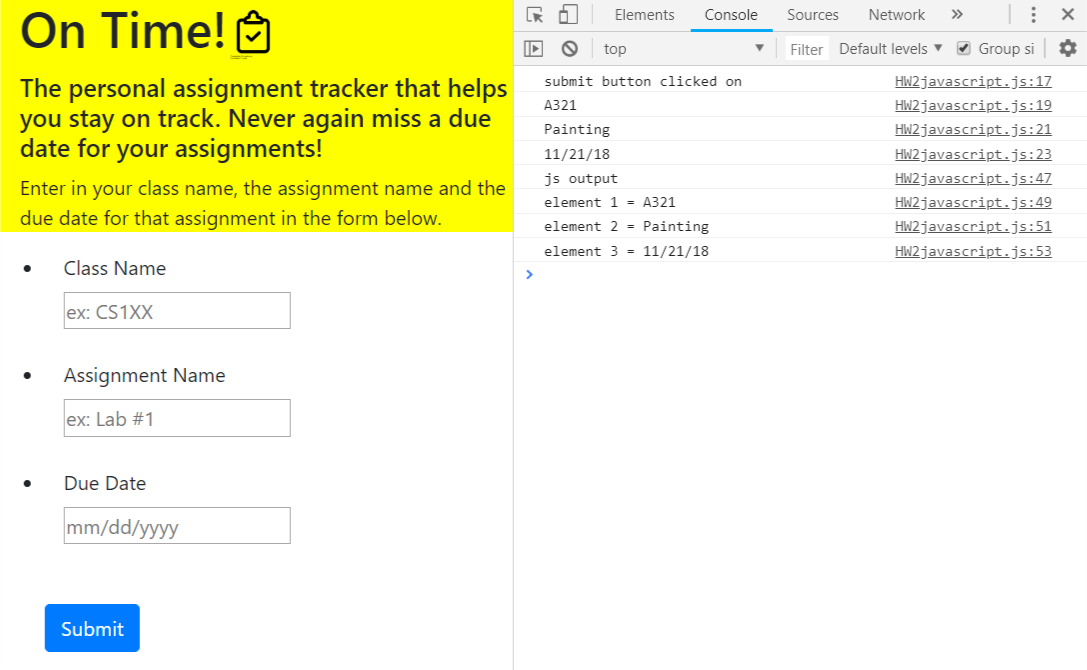

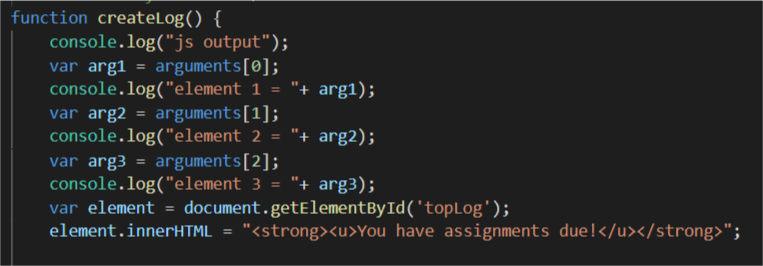
In the picture above with the snip-bit of code, this shows how I was able to use the "console.log()" function to, in essence, debug my code and see where my user input was going after the "Submit" button was clicked. In the next picture above you can see in the Developer Tools where my "console.log()" is printing out its information. The first four lines in my console window show that the code is running through each line in my function submitAssign() and showing the values from each text box after the submit button has been clicked on. The next four lines are for my output in Javascript. I again used the "console.log()" (see image below) to make sure each element was receiving the correct input and it is.
Now my next challenge was to have the output appear on the html site. I wanted each input to be displayed in a list for the viewer to see. I also wanted there to be an option for the user to delete any one of the items in the list for when an assignment was completed. Naturally I made this more difficult to execute at the beginning of this process but I then came across a similar idea from a previous student. I have borrowed and modified some of that code from that student to help me with this section of my code.


The modifications that I did to this borrowed code was that I wanted my inputs (now back as outputs) to be read of as a statement within the discription list. At the end of the statement there is a "Assignment Complete" button. This will allow the user to remove an assignment that is done. Here is where I have a technical issue. The user is able to remove an assignment, however, it removes the full list and when you go to enter in another assignment the code doesn't work. For the time being I will have to leave it this way and when I have some extra time I will come back to this and try to solve the issue. After you have pressed Assignment Complete, refreshing the page will put the site back in working order (until you press that button again).
Git Merging & the Command Line
For this assignment we were to practice working on a feature branch and then merge that branch back to our master branch. In the command line we are able to see a visual of this combination of branching and merging.

As I was submiting one of my previous commits you can see that the branch I was working on was ahead of my master branch by a commit. I then typed in a few git commands to sync my two branches back and prepared them for a merge (I forgot to grab a picture of that part).

After completing my sync and push of my branches to git I went ahead and typed in a command to view a graph of the branching that occured in this homework assignment (as pictured above). As you can see to the far left of the image there is a visual of the branching.